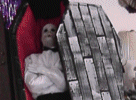
BIY Crypt
or
Build It Yourself Directions for Shorty's Crypt
|
|
These directions for BIY Crypt are extremely easy.
The crypt can be used for "your" Shorty or it can be used for any other creepy crawler coming in or out of the earth.
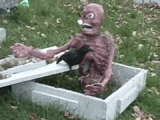 Very few items are needed for this BIY crypt. You will, however,
need Adobe Acrobat reader to be able to open the files for the patterns and
design. If you do not have Adobe Acrobat reader, click here (a new window will open so you can download it without leaving
this page).
Items Needed
-
3' x 4' piece of foam board - you may not find one that size, you might have to get a 8' x 4' piece. (This can be found at any Home Depot, Lowes, or any other home remodeling supply store. This would be found in the wood/insulation area.) It would be ok to get the larger size because then you would have plenty left over to make lots of tombstones (wink, wink, nudge, nudge).
-
Liquid Nails (LN-604) Foam board & Projects Adhesive (don't forget the caulk gun to be able to dispense it)
-
small can of gray flat latex house paint (or get a small can of white and a small can of black and mix your own. It's easy.)
Tools needed
-
knife or small saw for cutting the foam board (I used a box cutter knife.)
-
ruler
-
paint brush
-
small blunt object (I used the wooden end of a child's small art paint brush.)
1. Use the BIY crypt pdf file (to the right) to measure out the pieces on the foam board for your crypt. |
crypt pattern pdf file |
2. Use your box cutter (knife) to cut out the all the pieces. |
|
3. Take a 24" side and set it on the north end of the crypt. Take the shorter 22" side and put below and inside of the 24" side. Do the same with the other 22" side. Now take the last 24" side and make it the south end of the crypt. The south end will also be on the outside of the two 22" sides. (I hated the way this whole thing sounded so just look at the BIY crypt layout pdf file *to the right* and you'll get what I mean.) |
See the sides layout pdf diagram |
4. Use the Liquid Nails and squirt out some glue on the edges of each of the short boards. Attach them to the longer boards and hold for bit. It should adhere pretty quick but hold until it does. |
|
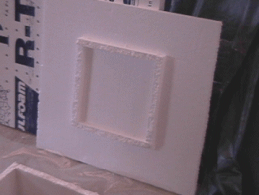 |
5. Layout the four 12"x1" pieces on top of the lid to form a square and see where to position it. Lift each piece up and squirt a row of glue on the bottom of each piece and stick to where you had it laid out. Apply a bit of pressure and hold until it's stuck on. |
6. Open the curly pattern (to the right) and print several copies on the printer. No need to print more than four. |
curly pattern |
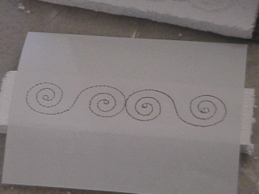 |
7. Center the pattern on each of the 12"x3" pieces. You can use straight pins in each corner to the paper in place. |
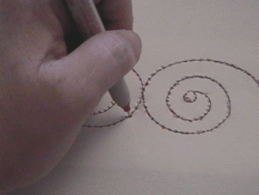 |
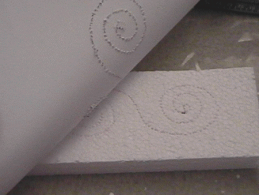
8. Use a sharp pencil and hole punch the pattern onto the foam board. (I used an old sharpie pen. Actually it wasn't an old one but when I got done, it was.) |
 |
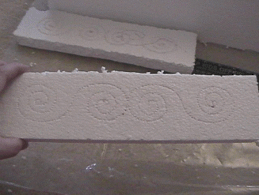 |
9. Then I took the backend of the small paintbrush and scraped out the pattern. You can also use a dull pencil. Just gouge out a row of the foam board so that the design shows up. The little circles on the end of the design ends up being one big hole. You can do any design that you want. I have seen another crypt that had their version of hieroglyphics as the design. |
|
10. The completed four 12"x3" pieces need to be attached to the center of each of the sides. Put the glue on the opposite side from the design, center the design pieces on the side boards and hold until attached. |
|
11. Now for the painting. There are various ways to paint this thing. |
|
My way: I just used good old gray that I mixed black paint with white paint. I took a paint brush, dipped it a few times in the black paint and wiped it off in a small bowl. Washed out the paint brush. Then dipped the brush in the white paint a few more times than I did with the black. I kept adding white until I had a color I wanted. |
|
Another way: Paint all the side designs with black. Don't worry about getting out of the design area. Then mix the paint (black and white like I did above) and paint the whole thing in gray. You then can paint another coat on top of the gray with either a lighter shade of gray (add more white) or just plain white with a sponge brush or a crumpled up piece of papertowel. Dip that into the paint and dab on to give it a more "granite" type of look. |
|
 |
This is why it's called BIY crypt! Ya dun good! Have fun! |
